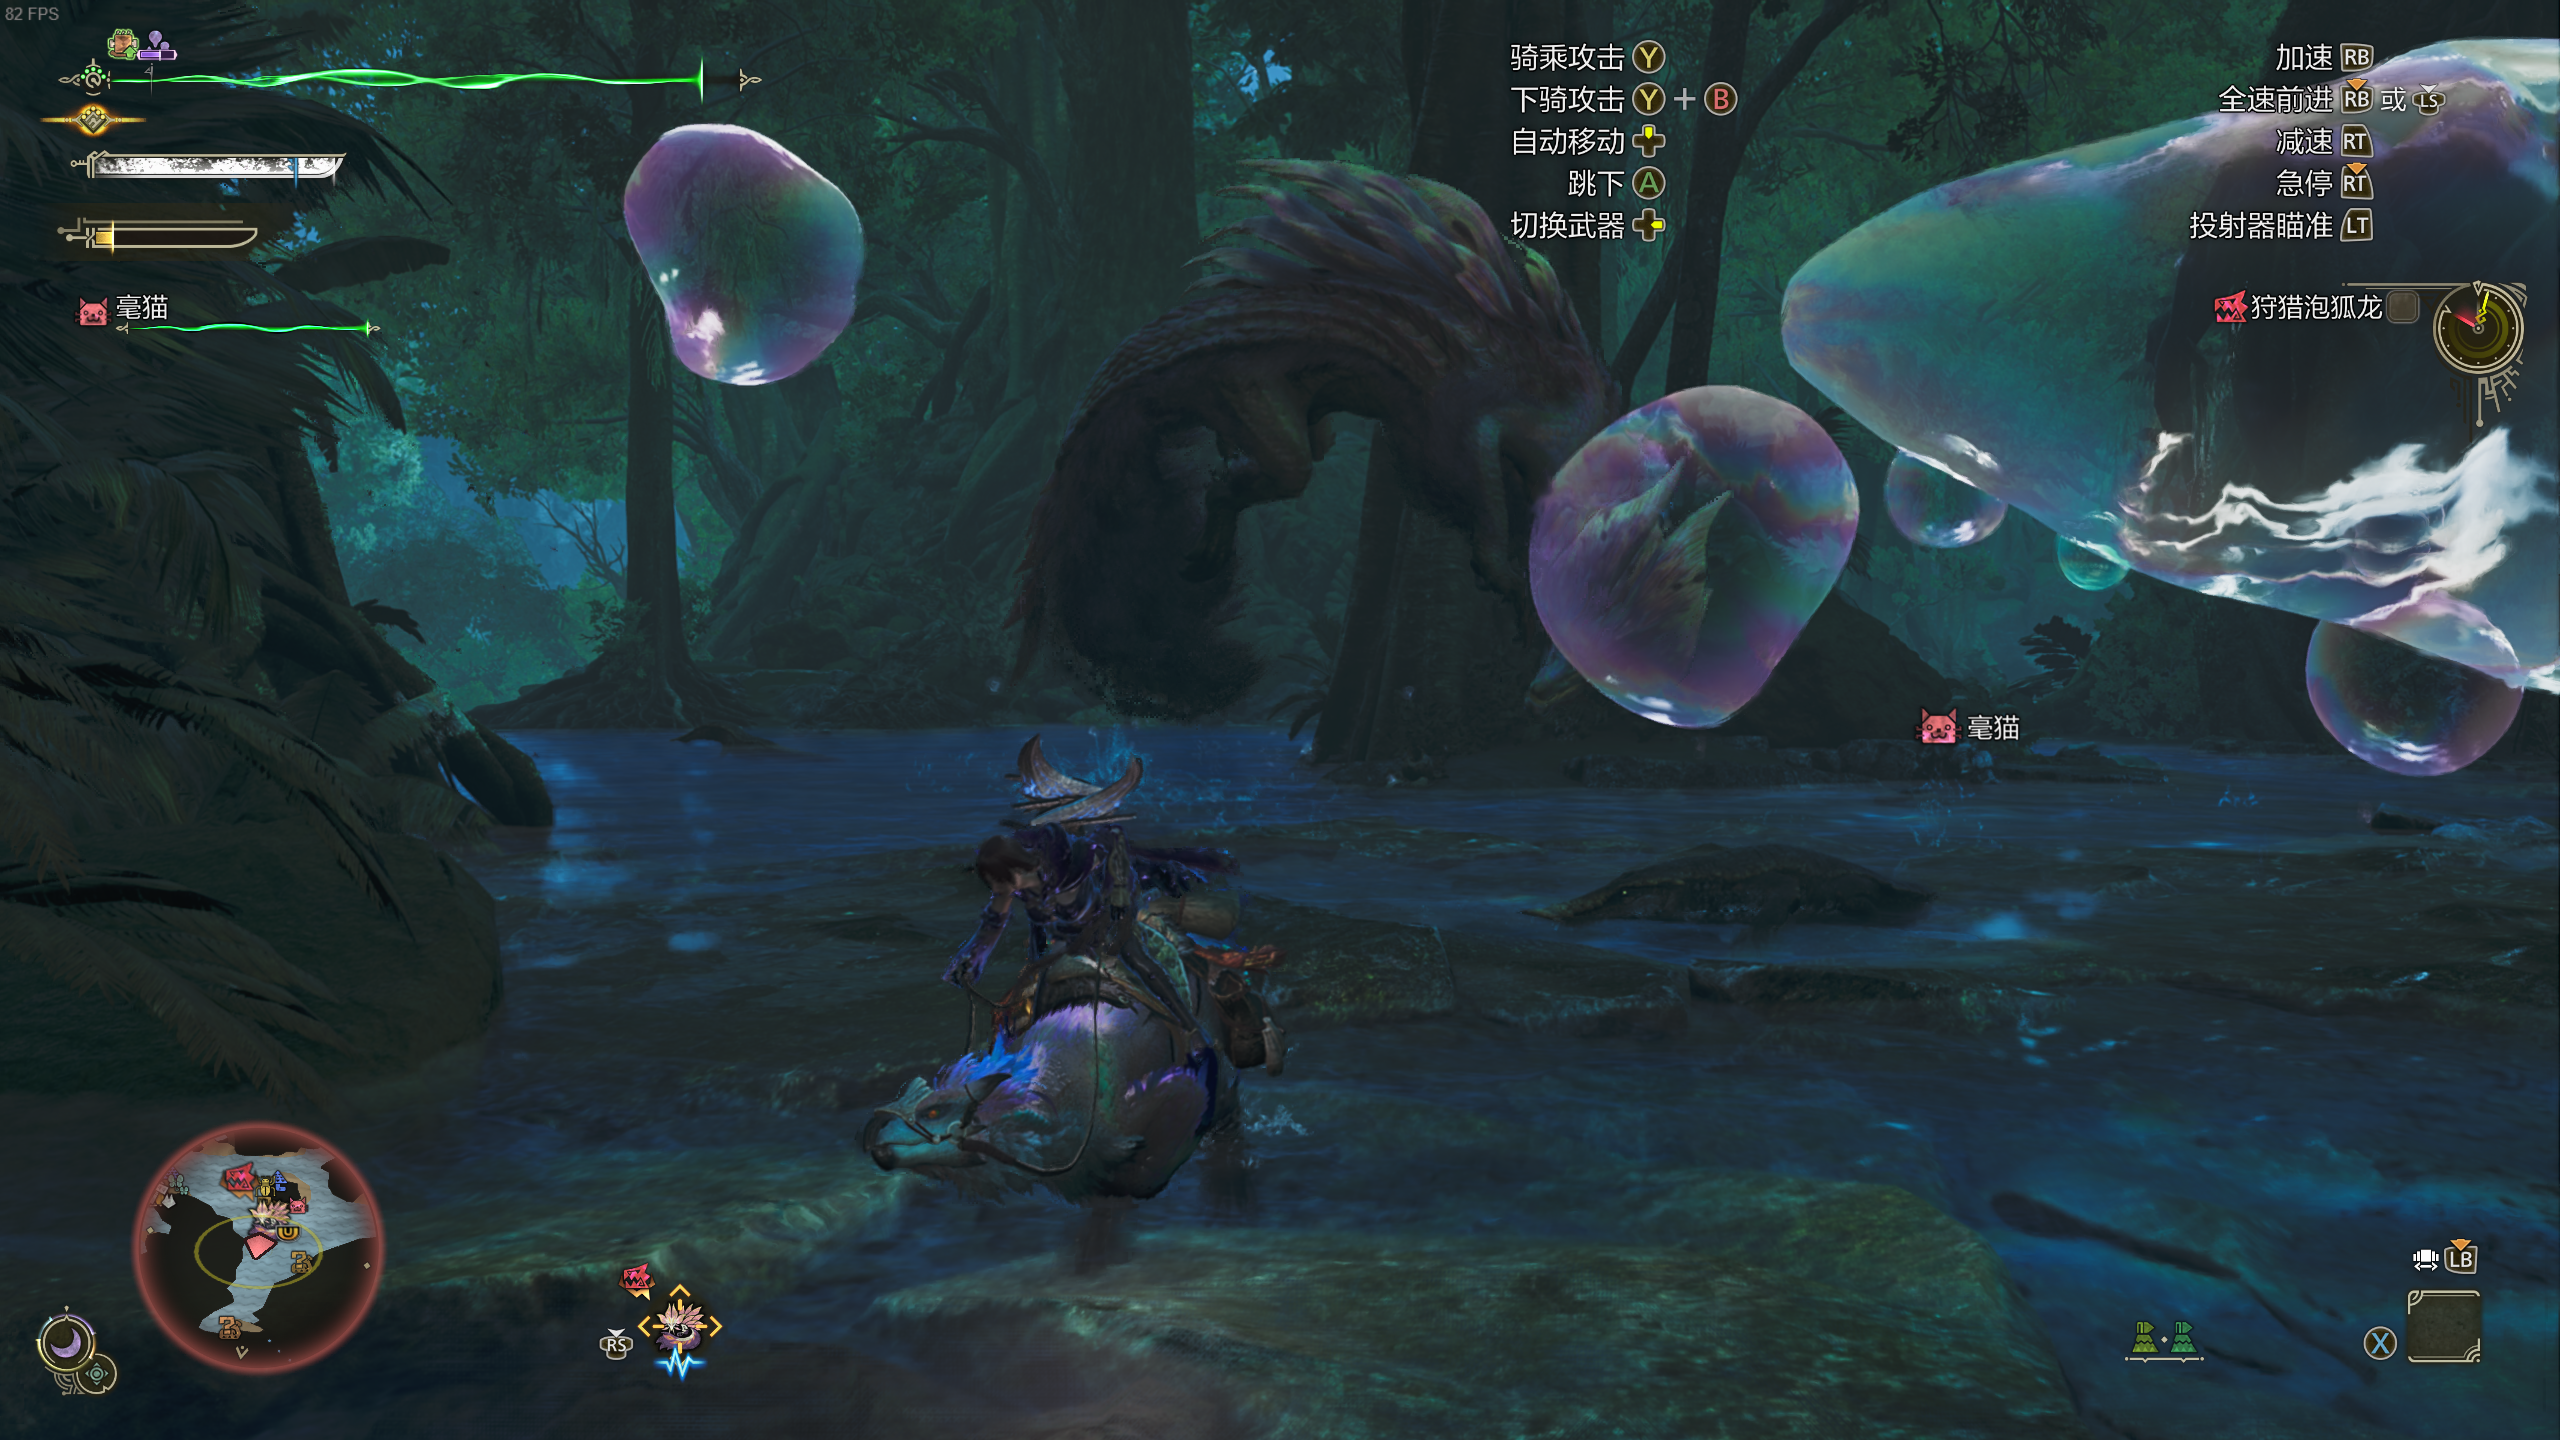
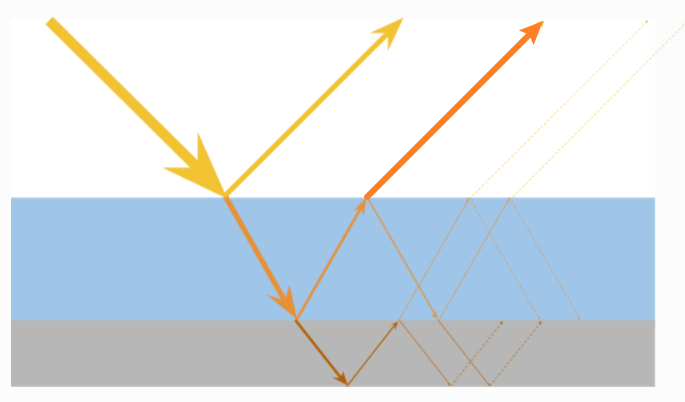
怪猎荒野新挤牙膏出的泡狐龙,只要有“新”怪还是非常好玩的;
泡狐龙泡泡的五彩,还有怪猎之前的一些材质效果,一些怪物皮毛鳞片,还有黄金油五彩斑斓的黑,都可以用虹彩来描述,专门的名词叫薄膜干涉,之前一直对这个效果有兴趣,这次整理一下。
光波长-虹彩颜色
先从物理意义来看,光不仅有粒子特性,还有波的特性,常规的光照模型中,光是被作为粒子来建模的,一个个光子在不同表面的折射反射计算,构建不同的光照模型;
光作为光子时,颜色由所带的能量决定,可见光的范围内,由低到高,由红色到紫色;
在计算薄膜干涉效果时,需要考虑到波的特性,光作为波时,与能量对应的属性是波长,波长由大到小,对应了红到紫,可见光的范围内,波长范围是700nm到400nm
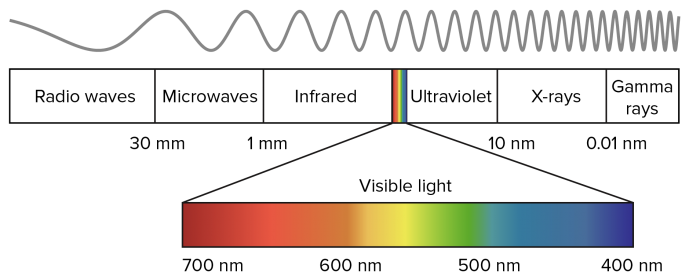
把波长映射到颜色,可通过采样贴图或者使用函数拟合;
贴图即使用类似如下的,400nm到700nm对应的颜色:

贴图还有好处是可以由美术自由设计风格化的虹彩色彩;
不过纹理采样的消耗比起函数来说大的多,尤其是在薄膜干涉需要计算多次光在薄膜之间反射折射的颜色,即需要多次采样贴图映射颜色
真实的人眼感知的光线颜色函数曲线如下

没有简单的函数可以完美拟合,有一些函数可以近似的拟合该曲线
JET Colour Scheme
1 | |

Bruton Colour Scheme
1 | |
模拟出了紫色

Bump Colour Scheme From GPU Gems
1 | |
避免了使用if;过渡柔和;可见光范围外是黑色;

Spektre Colour Scheme
1 | |

Zucconi Colour Scheme
1 | |
对Bump方案的优化,同样使用二次函数,更加拟合可见光的光谱颜色

1 |
|
使用了6个的二次函数,拟合效果更好
1 |
|

shader中计算光波长
薄膜干涉时,一束光线会有折射和反射的部分,折射的部分经过内部反射也会最终折射出来,如图
黄色的直接反射的部分,和橙色经过内部最终由折射出的部分,它们着色位置、方向是一致的,不同的地方在于光传播的距离不同,在薄膜中反射折射会有非常多次,渲染时一般只考虑到第二次折射;
另一点需要注意的是,同一点处的第一次反射(黄色)和第二次折射(橙色)实际上来自两束光线(他们的位置偏移,正好让那两条反射折射光线重合,能够互相干涉),在面不平的时候确实会有误差,这点近似误差是可以忽略的;
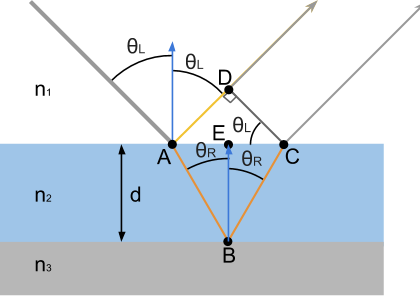
两次出射光的传播路程不一致,乃至于光波的相位不同;相位可以理解为所在光波函数的位置,在波峰或者波谷等不同位置,其能量会相互抵消或增强,最终体现出某一波长的颜色;
它们路径的差称为光程差(OPD),在介质密度不同时,因为光的传播速度不同,需要受不同的折射率影响

该值某种程度上能体现相位偏移,通过三角函数和Snell’s law (n1·sinθL = n2·sinθR)推导
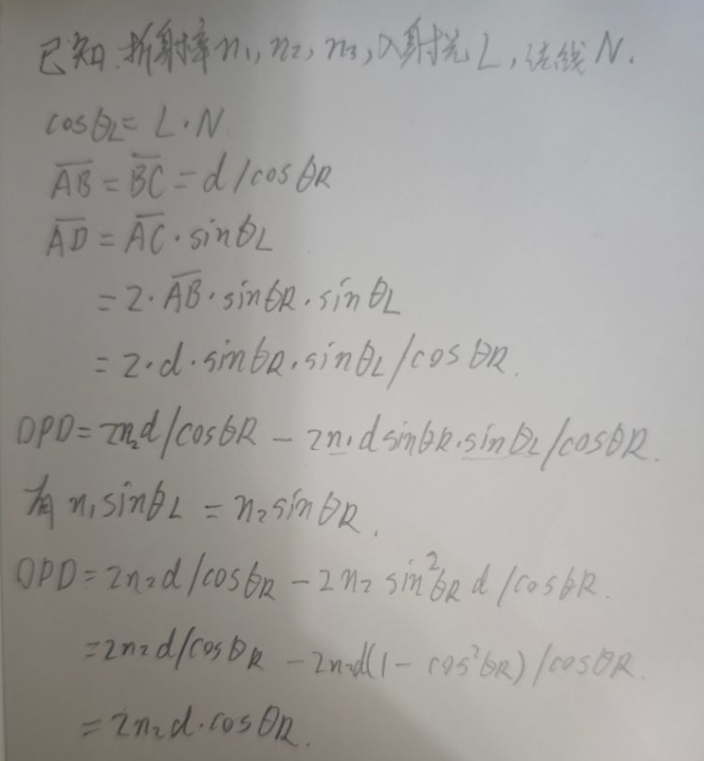
更详细的推导可以看这里
当OPD是波长的整数倍时,说明同相,则该波长的颜色会被增强
2 π OPD = nw
n是整数倍,w是波长,在shader中,可以通过w = OPD / n获得该处是何波长的颜色
渲染时,常规表面有的数据是入射光L,法线N,他们的夹角是θL,还是通过Snell’s law计算得到θR
1 | |
这样就可以获取虹彩的比较物理的颜色,注意波长单位是nm,所以不作处理的情况下,_Thickness需要比较大的数值
还有一点,当光从低折射率N1的介质传播到高折射率N2的介质时,它的相位会发生跳跃π度,相当于波峰变成了波谷,第二次折射从N2到N3时,如果N2也是小于N3,相位再次跳变后相当于没变,这种情况下,我们上面的代码是正确的;
另一种情况就是N1到N2和N2到N3只发生了一次跳变,需要把相位偏移考虑在内,即
1 | |
整合到PBR光照模型中
虹彩效果通过修改常规PBR BRDF 中的F项,具体是替换F0来实现,F项原本也是贡献了光线角度相关的反射率,包括反射颜色。
1 | |
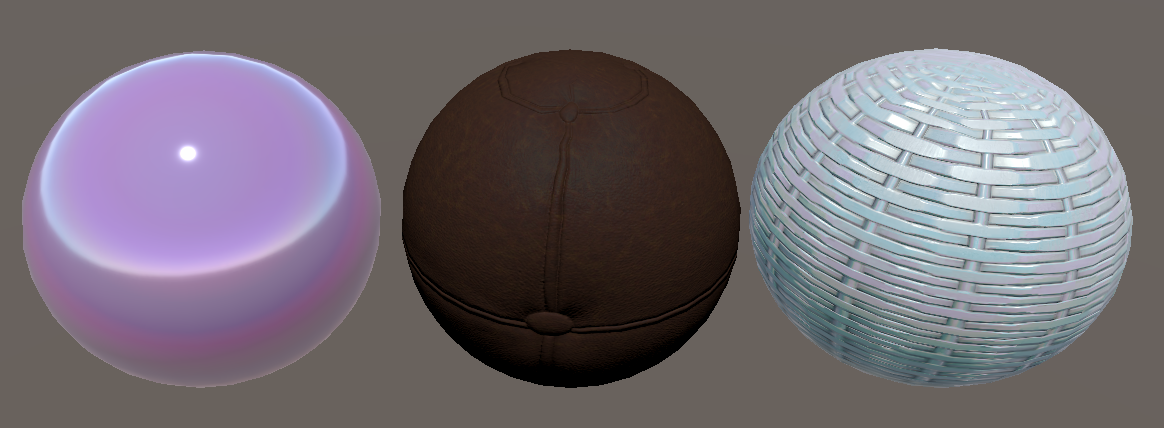
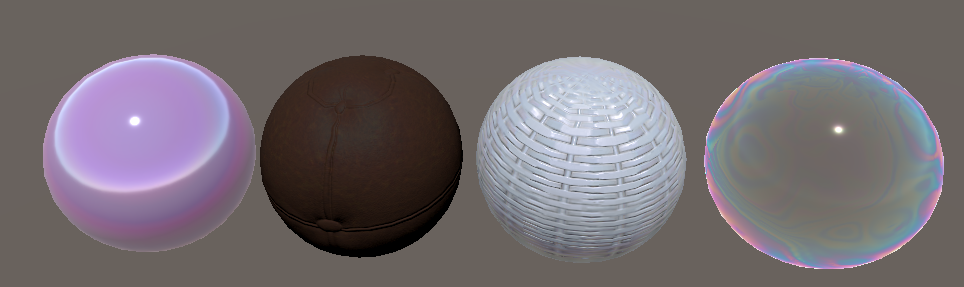
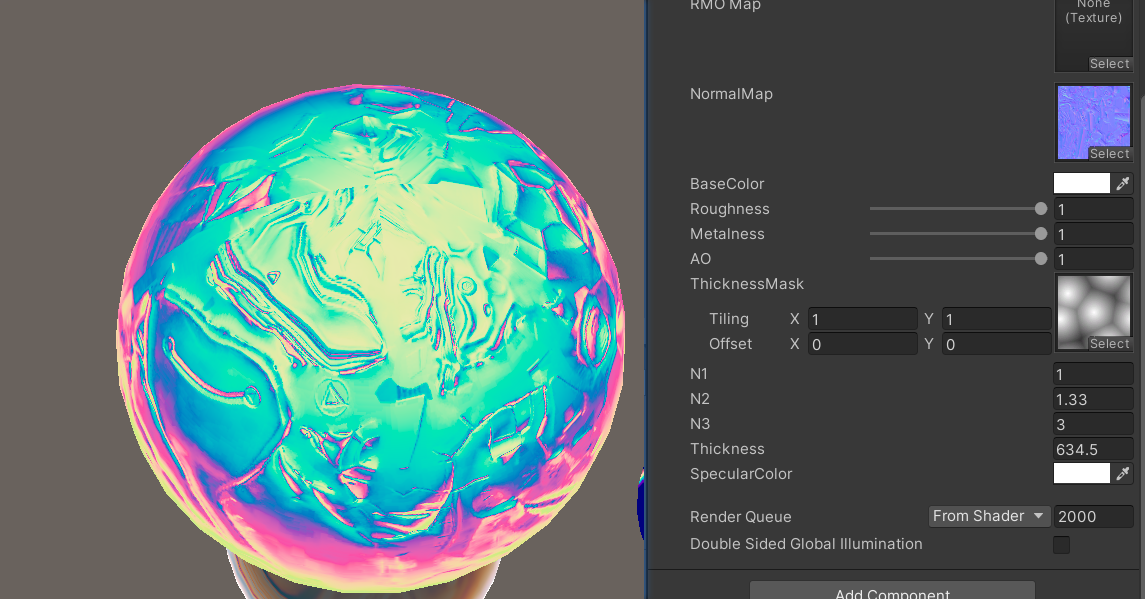
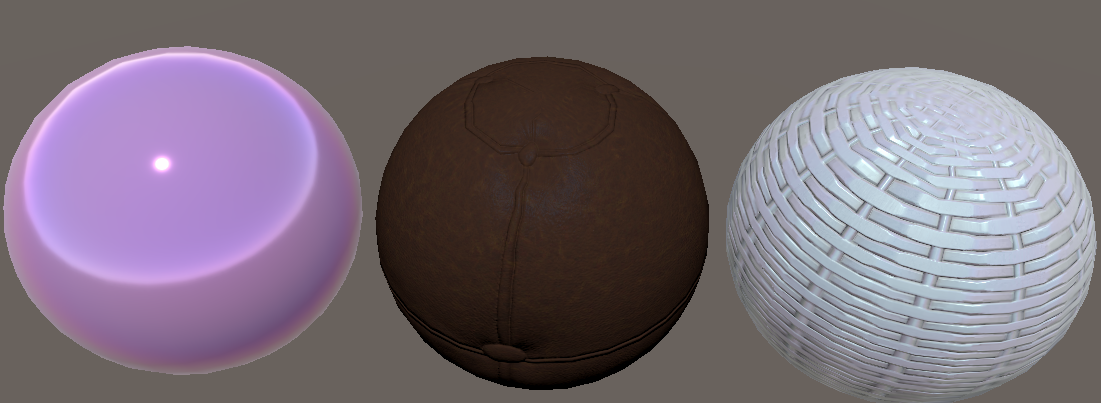
虹彩车漆-皮革-金属
Unity HDRP 的实现
技术出自A Practical Extension to Microfacet Theory for the Modeling of Varying Iridescence
Unity对其做了一些工程上的简化优化

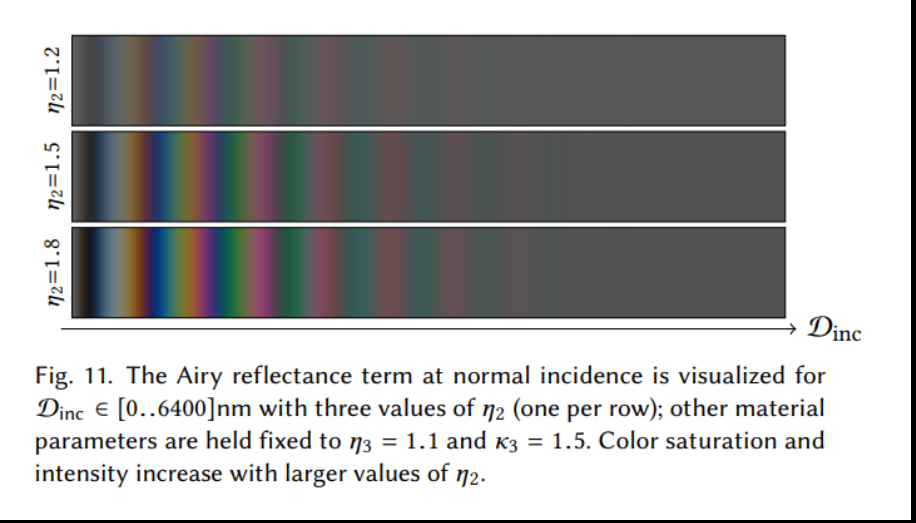
论文里提到不同折射率,光程差,角度都可以预积分出对应的干涉颜色贴图,EvalSensitivity应该是选择了一种常规比较适用的折射率下的情况的拟合函数
这个函数直接拟合了不同光程差(2 · n2 · d · cos)下的干涉颜色结果,不必像上面那样进行多次for循环模拟
1 | |
论文里提到,只关注Dinc = 2 n2 d,用Dinc作为一项变量,这里沿用了,看注释应该能推测出是以默认的n2 = 1.5的情况模拟干涉颜色的
默认了n1 < n2 < n3,eta_2 = lerp(2.0, 1.0, iridescenceThickness); 让只使用一个参数控制,这里不太标准的计算出了n2
1 | |
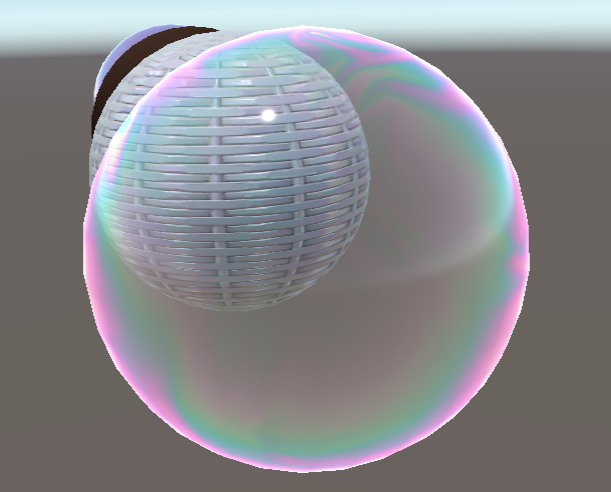
虹彩泡泡
泡泡等半透明对象的实现还是比较Hack的
替换漫反射部分使用虹彩颜色作为基础反射颜色,rim计算中心半透明效果,
1 | |
另外加上直接高光和间接光部分
1 | |